How to Sharpen a Hunting Knife
A dull knife is dangerous and slow. Learn edge angles, whetstones versus guided systems and strops, field touch-ups, how to test sharpness, and common mistakes.
A sharp knife is safer than a dull one. That sounds backward until you have watched someone force a dull blade through a hide, have it skate off, and bury itself in their other hand. A sharp edge bites where you put it and cuts with control. A dull edge slips, requires force, and turns field dressing into a fight.
Part of our Field & Kitchen series - what happens after the shot: the handling, butchering and cooking that turn a tag into good eating.
Sharpening intimidates a lot of hunters, but it comes down to a few simple ideas - hold a consistent angle, remove metal evenly on both sides until you raise a burr, then refine and polish that edge. Do that, and keep it touched up, and your knife will carry you through an entire animal without complaint - whether that is a whitetail deer in the timber or a whole limit of small game.
Understand the Edge Angle
Every edge is two bevels meeting at a point. The angle of those bevels, measured per side, is the single most important variable in sharpening.
- Lower angles (around 15 to 17 degrees per side) give a keener, more slicing edge. Great for skinning and fine work, but the thin edge is more fragile and dulls or chips faster on hard contact.
- Higher angles (around 20 to 22 degrees per side) give a tougher, more durable edge that holds up to bone contact and heavy use. Slightly less razor-keen, but more forgiving in the field.
For a general-purpose hunting knife, roughly 20 degrees per side is a sensible, durable middle ground. The exact number matters less than consistency. The most common reason home sharpening fails is changing the angle constantly, rounding the edge instead of refining it. Pick an angle and hold it through every stroke. Many guided systems and even a folded matchbook-thickness shim can help you find and keep it.
Whetstones vs Guided Systems vs Strops
Each tool has a job. Most hunters end up using more than one.
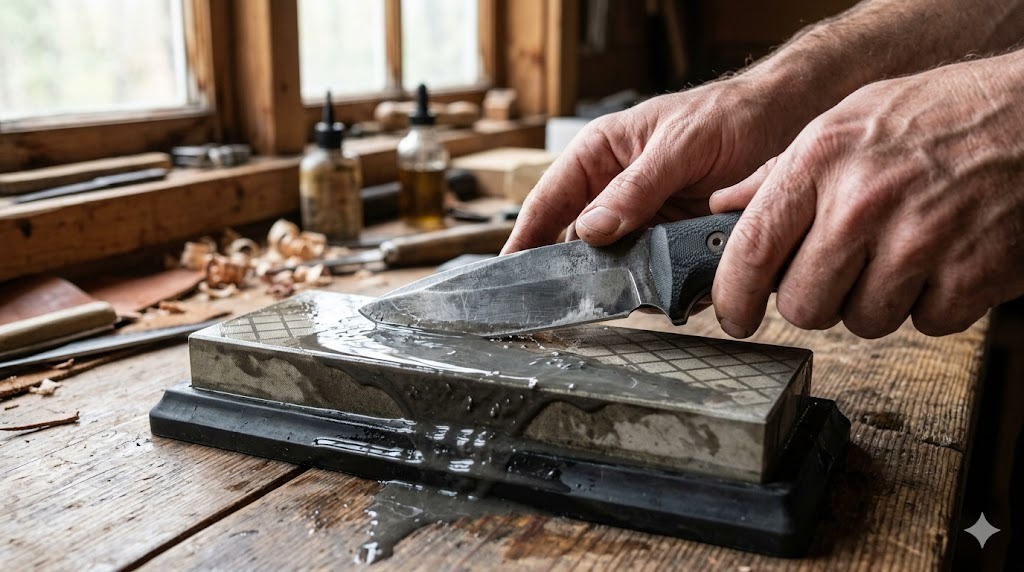
Whetstones (bench stones).
- The traditional, versatile choice. Water stones, oil stones, or diamond plates.
- You control everything, which means the most flexibility and the steepest learning curve - holding a consistent angle freehand takes practice.
- Work through grits - a coarse stone (around 200 to 400 grit) to set or repair the edge, a medium stone (around 800 to 1000) to refine, and a fine stone (1000-plus) to polish.
- Diamond plates cut fast, never dish out, and handle the hard modern steels well. A good starting point for most people.
Guided systems.
- Clamp the blade and hold the stone or rod at a fixed, repeatable angle - examples include rod-and-clamp kits and fixed-angle pull-through guides.
- They take the guesswork out of angle consistency, which is exactly where beginners struggle.
- Excellent for getting reliably sharp results before you have built freehand skill. The trade-off is setup time and less flexibility than a bare stone.
Strops.
- A strip of leather, often loaded with fine polishing compound.
- A strop does not really sharpen - it refines, aligns, and polishes an already-sharp edge, removing the tiny burr left by stones and adding that final hair-popping keenness.
- Pull the blade backward (spine-leading) along the leather. Quick, satisfying, and the best way to maintain an edge between full sharpenings.
A practical starter kit - a medium/fine diamond plate or a guided system to do the real sharpening, plus a strop to finish and maintain.
The Basic Sharpening Process
The mechanics on a stone are the same regardless of brand.
- Set your angle and commit to it for every stroke.
- Work one side with consistent strokes, pushing the edge across the stone as if you were trying to shave a thin layer off the top. Keep even pressure from heel to tip.
- Raise a burr. Sharpen one side until you can feel a tiny wire edge (a burr) on the opposite side along the whole length. The burr is proof you have sharpened all the way to the apex. Without it, you are just polishing a dull edge.
- Switch sides and repeat until the burr flips to the other side.
- Refine through grits. Move to finer stones, raising and removing progressively smaller burrs.
- Strop to remove the last of the burr and polish the edge.
Light, consistent pressure beats heavy grinding. Let the abrasive do the work.
Field Touch-Ups
You will not carry bench stones into the backcountry, and you do not need to. A blade that was properly sharp at home usually just needs realigning, not re-grinding, partway through an animal.
- Carry a compact tool - a small diamond rod, a pocket folding sharpener, or a credit-card-sized diamond plate. They weigh nothing.
- A few light strokes per side at your usual angle will bring a fading edge back enough to finish the job.
- A small strop or even the spine of a leather belt can realign an edge that has just rolled rather than dulled.
- Touch up before it gets bad. A knife that is “getting tired” takes ten seconds to refresh. A truly dull knife needs the full treatment you cannot do in the field.
Field care of your edge is part of field care of your meat - a sharp knife makes for cleaner cuts, less hacking, and faster work in conditions where speed matters. Our field-to-table venison guide covers why working quickly and cleanly protects the quality of what you bring home, and our field care and meat aging guide walks through the timing after the shot.
How to Test Sharpness
You need an honest way to judge your edge that does not involve cutting yourself.
- Paper test. Hold a sheet of paper and slice down through it. A sharp edge glides through cleanly; a dull one snags, tears, or folds the paper.
- Catch test. Gently rest the edge on a thumbnail at a low angle. A sharp edge catches and bites; a dull one slides off. (Light contact only.)
- Arm hair. A truly keen edge will shave hair off your forearm with no pressure. Useful, but not necessary for a working field edge.
- Visual. Look at the edge in good light. A dull or damaged edge reflects light as a thin bright line; a truly sharp apex is too thin to reflect.
For hunting, “shaving sharp” is a bonus, not a requirement. An edge that slices paper cleanly will dress and skin an animal just fine.
Common Mistakes to Avoid
- Inconsistent angle. The number one error. Wobbling rounds the edge instead of sharpening it.
- Too much pressure. Heavy grinding overheats thin edges and removes metal unevenly. Light and consistent wins.
- Never raising a burr. If you never feel a burr, you never reached the apex - you are just polishing dullness.
- Skipping the strop. A quick strop removes the burr and transforms a merely sharp edge into a keen one.
- Letting it get truly dull. Frequent light touch-ups are easy. A neglected, rounded edge is a long rebuild.
- Using the wrong angle for the steel. Hard, thin edges chip on bone; pick a tougher angle for a hard-use knife.
A sharp knife is the most basic, most important tool you carry into the field. Learn to hold an angle, raise and remove a burr, finish on a strop, and touch up before it fades - and you will never dread the next animal on the ground. For help choosing a blade worth sharpening in the first place, see our roundup of the best hunting knives.